03 Current Position
Overview
You will learn how to use the android Location Service to acquire the current car position and strategies to display it on the map.
Base
Use Tutorial02 as a starting point for this project.
Requesting Location Updates
For this purpose, we will use the Android LocationManager to acquire location updates. For more advanced strategies to acquire location updates see Location Strategies.
To retrieve location updates, you must request permission first to access the NETWORK_PROVIDER or GPS_PROVIDER in your AndroidManifest.xml.
<manifest ... >
    <!-- permission to access the GPS_PROVIDER -->
    <uses-permission android:name="android.permission.ACCESS_FINE_LOCATION" />
    <!-- permission to access the NETWORK_PROVIDER -->
    <uses-permission android:name="android.permission.ACCESS_COARSE_LOCATION" />
    ...
</manifest>
Attention
Be sure to set the Target-SDK version of your project to 22 to avoid problems with permission requests (Android target versions > 22 will not grant permissions to any resources like GPS or network when the user not explicitly allows the permission. If you want to use a newer target version, please implement the user request for yourself).
For retrieving location updates you have to implement the LocationListener interface and request updates for either the NETWORK_PROVIDER or the GPS_PROVIDER. For this example we implement the LocationListener interface as a field locationListener in our MainActivity and request the updates in the onCreate method. To stop the location updates we call removeUpdates in the onDestroy method.
public class MainActivity extends AppCompatActivity {
    ...
    private LocationListener locationListener = new LocationListener() {
        @Override
        public void onLocationChanged(Location location) {
            // here we will retreive new locations
        }

        @Override
        public void onStatusChanged(String s, int i, Bundle bundle) {}

        @Override
        public void onProviderEnabled(String s) {}

        @Override
        public void onProviderDisabled(String s) {}
    };

    private LocationManager locationManager;
    ...

    @Override
    protected void onCreate(Bundle savedInstanceState) {
        ...
        locationManager = (LocationManager)getSystemService(Context.LOCATION_SERVICE);
        // request update use NETWORK provider if its sufficent to retreive less accurate positions
        locationManager.requestLocationUpdates(LocationManager.GPS_PROVIDER, 0, 0, locationListener);
    }

    @Override
    protected void onDestroy() {
        super.onDestroy();

        locationManager.removeUpdates(locationListener);
    }
    ...
}
Notify the SDK
This would be enough to get the current position and show it on the MapView. But we also need to notify the SDK about the location updates so that we can use the position in a possible navigation for example. For this reason, we have the GPSManager singleton in the NavigationSDK. We need to initialize it by calling openGPSDevice and then we need to push the location we are getting in onLocationChanged to the SDK. It is necessary to close the device in onDestroy of our MainActivity.
public class MainActivity extends AppCompatActivity {
    ...
    private LocationListener locationListener = new LocationListener() {
        @Override
        public void onLocationChanged(Location location) {
            GPSManager.getInstance().pushLocation(location);
        }
        ...
    };
    ...
    @Override
    protected void onCreate(Bundle savedInstanceState) {
        ...
        try
        {
            GPSManager.getInstance().openGPSDevice(false);
        }
        catch (NavigationException e)
        {
            e.printStackTrace();
        }
    }

    @Override
    protected void onDestroy() {
        ...
        try {
            GPSManager.getInstance().closeGPSDevice();
        } catch (NavigationException e) {
            e.printStackTrace();
        }
    }
    ...
}
The NavigationLoop
To update our MapView with the current position we implement one of the core mechanisms of this Tutorial. The NavigationLoop is a runnable which is called every second by a timer to update our navigation state. We extend java.lang.Runnable and give it a MapView member we can manipulate later. To implement this, we create a TimerTask in our MainActivity and start in onCreate and stop it in onDestroy. Also, we create a NavigationLoop member in our MainActivity and instantiate it in onCreate and call the run() method in the TimerTask.
public class NavigationLoop implements Runnable {
    private final MapView mapView;

    public NavigationLoop(MapView mapView) {
        this.mapView = mapView;
    }

    @Override
    public void run() {
       // here we will manipulate our MapView
    }
}
public class MainActivity extends AppCompatActivity {
    NavigationLoop navigationLoop;
    ...
    TimerTask navigationLoopTrigger = new TimerTask(){
        @Override
        public void run() {
            navigationLoop.run();
        }
    };

    @Override
    protected void onCreate(Bundle savedInstanceState) {
        ...
        navigationLoop = new NavigationLoop(mapView);

        Timer t = new Timer();
        t.schedule(navigationLoopTrigger, 0, 1000);
    }

    @Override
    protected void onDestroy() {
        ...
        navigationLoopTrigger.cancel();
        ...
    }
}
Update the map position
Now we can set the MapView position in the NavigationLoop to the current gps position. To avoid setting the map to a bogus position we check if GPSData has a Fix with getFix() before setting the MapView center.
public class NavigationLoop implements Runnable {
    ...
    @Override
    public void run() {
        try
        {
            final GPSData gps = GPSManager.getInstance().getCurrentPosition();
            if (gps.getFix() > 0)
            {
                mapView.setCenter(gps.getGPSPositionMerc());
                mapView.update();
            }
        }
        catch (NavigationException e)
        {
        }
    }
}
Draw the CCP
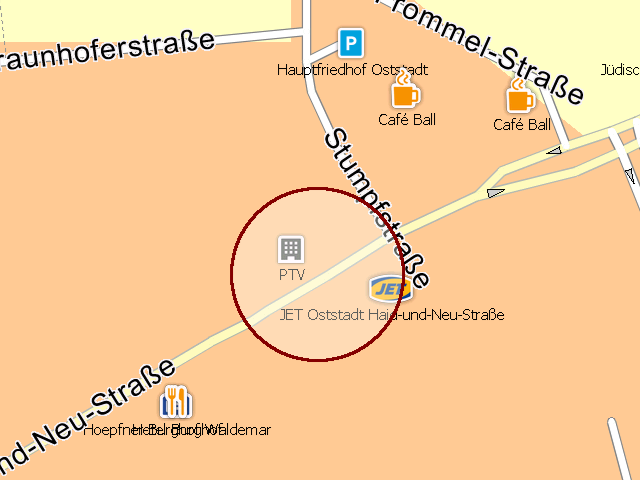
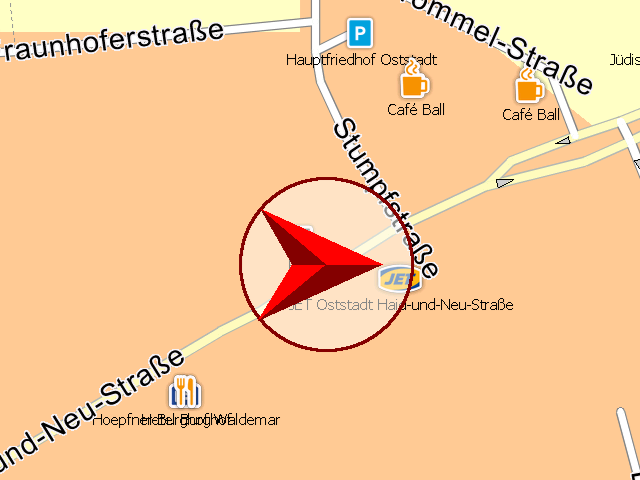
The easiest way to draw the current car position (CCP) is to use MapView.setMapMarker(). It comes in two styles:
| MapMarkerStyles | |
|---|---|
 |
 |
MapView.MapMarkerStyle.Round |
MapView.MapMarkerStyle.Directed |
We just set the MapMarker with the mercator position the orientation(course) of the GPSData and the desired style.
public class NavigationLoop implements Runnable {
    ...
    @Override
    public void run() {
        try
        {
            GPSData gps = GPSManager.getInstance().getCurrentPosition();
            if (gps.getFix() > 0)
            {
                mapView.setMapMarker(
                    gps.getGPSPositionMerc(),
                    gps.getCourse(),
                    true,
                    MapView.MapMarkerStyle.Directed
                );

                mapView.setCenter(gps.getGPSPositionMerc());
                mapView.update();
            }
        }
        catch (NavigationException e)
        {
        }
    }
}
Extended CCP drawing
If you wan't to use your own CCP image you have two options. First you can use NavigationSDK.addImage() and NavigationSDK.positionImage() to set an image to a desired position at the map. The image has to be in the dataPath of your application. Drawback of this approach is that you cannot alter the orientation of the CCP.
    // no ccp orientation
    int id = NavigationSDK.addImage("ccp.png", gps.getGPSPositionMerc());
    NavigationSDK.positionImage(id, gps.getGPSPositionMerc());
Second you can use MapView.transformCoordinates() to transform a GeoPosition or Position to a pixel coordinate on the MapView and then override draw of MapView to visualize your own CPP on the MapView.
In the MapView class, override the draw() method:
@Override
public void draw(Canvas canvas) {
    super.draw(canvas);

    GPSData gps = null;
    try {
        gps = GPSManager.getInstance().getCurrentPosition();
    } catch (NavigationException e) {
        return;
    }

    // convert current position to pixels
    Position pixelPos = transformCoordinates(
            CoordinateSystem.MERCATOR,
            gps.getGPSPositionMerc(),
            CoordinateSystem.PIXEL
    );

    Bitmap bmp = BitmapFactory.decodeResource(context.getResources(), R.drawable.ccp);

    // if in bounds
    if (pixelPos.getX() >= -bmp.getWidth()
            && pixelPos.getY() >= -bmp.getHeight()
            && pixelPos.getX() < (getWidth() + bmp.getWidth())
            && pixelPos.getY() < (getHeight() + bmp.getHeight()))
    {
        Matrix matrix = new Matrix();
        matrix.postTranslate(
                -(bmp.getWidth() / 2),
                -(bmp.getHeight() / 2)
        );
        matrix.postRotate(getOrientation() - gps.getCourse() + 90);

        matrix.postTranslate(pixelPos.getX(), pixelPos.getY());

        canvas.drawBitmap(bmp, matrix, null);
    }
}