02 Basic map drawing
Overview
We will learn how to display a simple map and how to add map interactions like zooming or panning.
Base
You can use your results from Tutorial01 as a base for our new project.
Prerequisites
We put the map drawing related functions of our tutorials in a class called MapWidget. Please copy the following files from the source directory "Tutorial02" to the "Tutorial" directory and add them to the CMakeLists.txt:
- MapWidget.cpp
- MapWidget.h
The edited CMakeLists.txt sections should look like this:
...
set(Tutorial_SRCS
    main.cpp
    MainWindow.cpp
    Constants.cpp
    MapWidget.cpp
)

set(Tutorial_HEADER
    MainWindow.h
    Constants.h
    MapWidget.h
    ${PROJECT_SOURCE_DIR}/navigationsdk/SDKInterface.h
    ${PROJECT_SOURCE_DIR}/navigationsdk/SDKError.h
    ${PROJECT_SOURCE_DIR}/navigationsdk/SDKDef.h
)
Call cmake ../ in the build directory or build the ALL_BUILD project of the solution to update it.
Also, always trigger a rebuild after copying to ensure that replaced files will be newly built.
Adding a map view
For showing a map, we have to add the above mentioned MapWidget to our MainWindow. We also add a menu for switching some map parameters. To do this the short way, copy the mainwindow.ui from the "Tutorial02" folder to your "Tutorial" folder and override the old version.
!!! note: When replacing an .ui file, the build system sometimes doesn't recognize that the file has changed. So edit the file (for example add and remove a space) and save it so that it's time stamp changes.
You also can add the MapWidget with the designer:
Open the mainwindow.ui with the Qt Designer and add a standard QWidget to the MainWindow. Stretch it so it fills the whole area. Right click the new QWidget and click "user defined classes...". In the upcoming window, add a new class with base "QWidget" and the name MapWidget. Click on ok. The widget is now a placeholder for our MapWidget. Name the widget "map".
We will add some menu entries for showing the map in 2D or 3D, for switching the night mode and for switching the grey mode.
For this, we add a menu entry called "Map". Add submenu entries to "Map" called "Show in 3D", "Show grey mode" and "Show night mode".
Rename the actions created by the Designer to "action3D", "actionShowGreyMode" and "actionShowNightMode". Check the "checkable" box for all three actions.
The MainWindow in the Designer view should look like this:

Add the following to the MainWindow class:
MainWindow.h:
...
protected slots:
    void action3DToggled(bool checked);
    void actionGreyModeToggled(bool checked);
    void actionDayModeToggled(bool checked);
MainWindow.cpp:
...
MainWindow::MainWindow(QMainWindow * parent) : QMainWindow(parent)
{
    ui.setupUi(this);

    SDK_ERROR rc = SDK_Initialize(Constants::getMapPath().toStdWString().c_str(), L"deu",
                                  Constants::getAddrPath().toStdWString().c_str(),
                                  Constants::getDataPath().toStdWString().c_str(), SDK_FALSE);

    ui.map->initialize();

    SDK_Position pos;
    pos.x = 934790;
    pos.y = 6269440; // this should be around karlsruhe...
    ui.map->setCenter(pos);

    connect(ui.action3D, SIGNAL(toggled(bool)), this, SLOT(action3DToggled(bool)));
    connect(ui.actionShowGreyMode, SIGNAL(toggled(bool)), this, SLOT(actionGreyModeToggled(bool)));
    connect(ui.actionShowNightMode, SIGNAL(toggled(bool)), this, SLOT(actionDayModeToggled(bool)));
}


MainWindow:: ~MainWindow()
{
}

void MainWindow::action3DToggled(bool checked)
{
    ui.map->set3d(checked);
}

void MainWindow::actionGreyModeToggled(bool checked)
{
    ui.map->setGreyMode(checked);
}

void MainWindow::actionDayModeToggled(bool checked)
{
    ui.map->setDayMode(!checked);
}
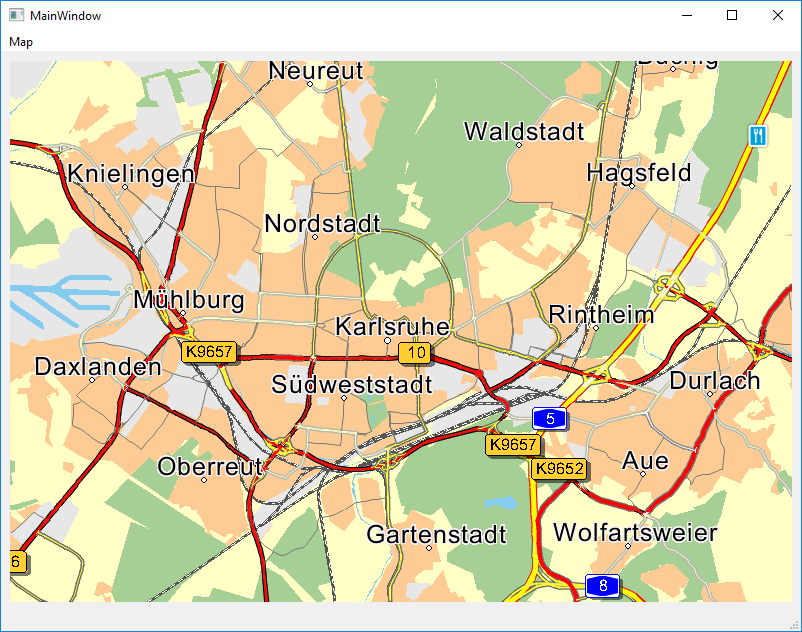
We initialize our MapWidget in the constructor and set the center position of the map initially to Karlsruhe/Germany. After that, we connect the actions we created in the Designer. Build the app and start it, it should show something like this:
Initializing a map view
To show a map, we need a map view. The SDK has three possibilites to initialize a map view:
- SDK_InitMapView(), only useable under Windows (not UWP), will be initialized with an HWND
- SDK_InitMapDC(), only useable under Windows (not UWP), will be initialized with an HDC
- SDK_InitMapViewFB(), useable on all platforms
We use SDK_InitMapViewFB() for initializing the map view. It is independent from the underlying system API and therefore works on all platforms. On the Windows platform, you also have the possibility to use a window handle or a HDC to render the map to, but we do not cover these methods here. See the documentation for more details.
SDK_InitMapViewFB() has the following parameters:
| Parameter type | Parameter name | Description |
|---|---|---|
| SDK_UINT2* | pixelData | The pixel buffer used for rendering the map to |
| SDK_UINT2 | width | The width of the pixel buffer, must be a multiple of 2 |
| SDK_UINT2 | height | The height of the pixel buffer |
| SDK_BOOL | upsideDown | Change vertical rendering direction |
| SDK_INT4* | pHandle | A mapview id (>= 0) or value <0 in case of error |
!!! note:
The internal renderer uses 2 Bytes per pixel in RGB565 format. So the size of the buffer for a window with the size "width * height" in pixel must be width * height * 2 [Byte]. The width of the buffer and the width parameter of the SDK_InitMapViewFB() function must be a multiple of 2 to avoid rendering distortions.
So, let's have a look at the MapWidget class. There are some steps that need to be done to show a map:
- Create a render buffer in the correct size.
As mentioned above, every pixel internally has a size of 16bit (in the format RGB565). So the size of the buffer must be
ViewportX * ViewportY * 2in [Byte]. Also, ViewportX must be a multiple of 2. The SDK will render the map into this buffer - Initialize the map view by calling SDK_InitMapViewFB() with the created buffer
- Render the map (to the buffer) with SDK_SendMapViewEvent() and SDK_wmPAINT as parameter "message" in the sent SDK_MapViewEventData struct
- Blit the buffer with the rendered map to your view
- Resize the map view if needed by deleting the old buffer, creating a new buffer in the correct size and calling SDK_SendMapViewEvent() with SDK_wmSize as the message and the correct width and height
The initialization of the map view is done in the initialize() function of our MapWidget class:
MapWidget.cpp:
void MapWidget::initialize()
{
    resizeBuffers();

    SDK_ERROR rc = SDK_InitMapViewFB((SDK_UINT2*)mBuffer, mWidth, mHeight, SDK_TRUE, &mMapId);
    if(mUseMapViewControls) // enable the internal controls on the map
        rc = SDK_SetMapViewElements(mMapId, (SDK_UINT4)(SDK_mapMEASURECTRL | SDK_mapPANNINGCTRL | SDK_mapROTATIONCTRL | SDK_mapSCALINGCTRL), 0);
    else // disable the internal controls
        rc = SDK_SetMapViewElements(mMapId, 0, (SDK_UINT4)(SDK_mapMEASURECTRL | SDK_mapPANNINGCTRL | SDK_mapROTATIONCTRL | SDK_mapSCALINGCTRL));
    //setMapDesign();
}
resizeBuffers() method:
void MapWidget::resizeBuffers()
{
    if (mImage)
        delete mImage;
    if (mBuffer)
        delete[] mBuffer;

    mWidth = width();
    mHeight = height();

    // set the internal width of the buffer to a multiple of 2 which is needed by the internal renderer
    if ((mWidth % 2) != 0)
        mWidth--;

    mBuffer = new uchar[mWidth * mHeight * 2];
    mImage = new QImage(mBuffer, mWidth, mHeight, QImage::Format_RGB16);
}
For showing the map, we have to blit the rendered map from our buffer to the screen. Because we use Qt in our examples, we will use a QImage for this. We create a QImage with the newly created buffer as the background buffer. So when rendering the map later in the paintEvent(), the image will hold the rendered map. A pixel in the buffer will be rendered in 16 bit RGB565 format. So we set the QImage to this format.
After creation of the buffer, we call
SDK_InitMapViewFB(SDK_UINT2 *pixelData, SDK_UINT2 width, SDK_UINT2 height, SDK_BOOL upsideDown,
                  SDK_INT4 *pHandle)
upsideDown is used to change the vertical rendering direction. Under Windows, we set this to SDK_TRUE. If the map will be rendered upside down, change this flag appropriately.
The pHandle is a pointer to an integer. The integer value is used to identify a map view. You can create as many map views as you want as long as memory is available.
Different map views can show simultanously different views of a given map in different scales. But be aware that some SDK functions will alter all
map views at once (like adding an image with SDK_AddImage()).
Rendering the map
MapWidget.cpp:
void MapWidget::paintEvent(QPaintEvent *event)
{
    SDK_MapViewEventData e;
    SDK_InitMapViewEventData(&e);
    e.message = SDK_wmPAINT;

    SDK_ERROR rc = SDK_SendMapViewEvent(mMapId, mNavigationInformation, &e, mBuffer);

    QPainter painter(this);
    QPixmap pixmap = QPixmap::fromImage(*(mImage));
    painter.drawPixmap(0, 0, pixmap);
}
SDK_SendMapViewEvent() has the following parameters:
| Parameter type | Parameter name | Description |
|---|---|---|
| SDK_INT4 | MapView | the map view we want to change |
| const SDK_NavigationInformation* | pNavigationInformation | Optional pointer to a NavigationInformation object. If non-NULL and the information belongs to a valid navigation situation the route is painted as a blue trace into the map. If NULL, a route trace will not be rendered, even if one is available! |
| const SDK_MapViewEventData* | pMapViewEvent | Pointer to event structure |
| void* | pixelData | Pixel buffer, only used when the map view was initialized by SDK_InitMapViewFB and the event is SDK_wmSize |
The struct SDK_MapViewEventData is used to hold the type of the event and the event parameters. It has the following members:
| Type | Name | Description |
|---|---|---|
| SDK_HDRINFO | size | size of the structure - for controlling |
| SDK_HDRINFO | version | Version of the structure - for controlling. Use SDK_MapViewEventDataVERSION |
| SDK_UINT4 | message | Message event code |
| SDK_INT4 | x | x coordinate |
| SDK_INT4 | y | y coordinate |
| SDK_INT4 | width | width, only used if message==SDK_wmSIZE |
| SDK_INT4 | height | height, only used if message==SDK_wmSIZE |
| SDK_INT4 | delta | delta value, only used if message=SDK_wmWWHEEL |
The SDK renders the map into the pixelData buffer. This buffer now must be painted to our MapWidget background so we can see it. We use the QImage that we created earlier for this. We convert the QImage to a QPixmap and paint that pixmap to our window by calling painter.drawPixmap(). This is Qt specific, in other frameworks you have to blit the buffer to the window with the given API functions.
Changing viewing parameters
You can change the center of the map, the 2D/3D viewing, the scale of the map, the orientation (rotation) of the map and the pitch by calling SDK_SetMapViewParameter().
SDK_SetMapViewParameter() function has the following parameters:
| Parameter type | Parameter name | Description |
|---|---|---|
| SDK_INT4 | MapView | the map view we want to change |
| SDK_INT4 | Mask | A bit mask of the parameters that should be changed, see the available parameters below |
| SDK_INT4 | CenterX | the new map center x position in mercator (only used if the bit flag SDK_SV_Center is set in Mask) |
| SDK_INT4 | CenterY | the new map center y position in mercator (only used if the bit flag SDK_SV_Center is set in Mask) |
| SDK_INT4 | Scale | The new scale. The lowest value is 100, the lower the nearer. (only used if the bit flag SDK_SV_Scale is set in Mask) |
| SDK_INT4 | Orientation | The new orientation of the map (only used if the bit flag SDK_SV_Orientation is set in Mask) |
| SDK_BOOL | Mode3d | If set to SDK_TRUE, the map will be rendered in 3D, else in 2D (only used if the bit flag SDK_SV_Mode3d is set in Mask) |
| SDK_INT4 | Pitch | Sets the pitch of the map view (only used if the bit flag SDK_SV_Pitch is set in Mask) |
List of available viewing parameters:
| Map View Parameter | Description | |------------|-----------------|-------------| |SDK_SV_ZoomToRoute | Sets the scale of the map view to show the complete route, uses none the value parameters given | |SDK_SV_Center | Sets the center of the map view | |SDK_SV_Scale | Sets the scale of the map view | |SDK_SV_Orientation | Sets the orientation of the map view | |SDK_SV_Mode3d | Sets the 3d mode of the map view | |SDK_SV_Pitch | Sets the pitch angle of the map view | |SDK_SV_All| shortcut for: (SDK_SV_Center | SDK_SV_Scale | SDK_SV_Orientation | SDK_SV_Mode3d | SDK_SV_Pitch) |
For example, setting the scale of the map to 1000 (100 is nearest) and the orientation to 230 degrees, we call
SDK_ERROR rc = SDK_SetMapViewParameter(mMapId, SDK_SV_Scale | SDK_SV, 0, 0, 1000, 230, 0, 0)
- SDK_SV_ZoomToRoute will zoom the map so that the complete route is visible, this flag needs no value parameters, so set them all to 0.
- SDK_SV_All is a shortcut for (SDK_SV_Center | SDK_SV_Scale | SDK_SV_Orientation | SDK_SV_Mode3d | SDK_SV_Pitch).
Changing map view colors for day/night mode
To set the map view to night mode, call:
SDK_ERROR rc = SDK_SetMapViewDayNight(mMapId, isDay ? 100 : 0);
Changing map view colors to grey mode
To set the map view to grey mode, call SDK_SetMapViewGrayMode():
SDK_ERROR rc = SDK_SetMapViewGrayMode(mMapId, isGrey);
Map interaction
There are two possibilities to interact with the map:
- use the built in standard map controls
- manually set the pan, scale, zoom and rotation values
The source code in the MapWidget class shows exemplarily how you could interact with the map with or without the built in interactors. Just set the variable
mUseMapViewControls in the constructor of the MapWidget to enable or disable the interactors.
Standard map controls
The NavigationSDK map view provides some controls which can be used to pan, zoom, scale or rotate the map. The only thing to do is to redirect the mouse events to the SDK using SDK_SendMapViewEvent() with the appropriate parameters.
If you do not want to implement the gestures for yourself and you are using a mouse, the easiest way to interact with the map is to use these controls.
List of available controls:
| Control Id | Type of control | Description |
|---|---|---|
| SDK_mapMEASURECTRL | measure control | Shows a measure ruler on the map |
| SDK_mapPANNINGCTRL | panning control | Used for panning the map, has size of the entire map view |
| SDK_mapROTATIONCTRL | rotation 2D control | Used to rotate the map in 2D mode |
| SDK_mapSCALINGCTRL | scaling control | Used to scale the map in 2D mode |
| SDK_mapROTATION3dCTRL | rotation 3D control | Used to rotate the map in 3D mode |
| SDK_mapHEIGHT3dCTRL | height control in 3D | Not used, scale control has same functionality |
There is one more control, the wheel mouse control to change the scale with the wheel mouse. This control is not deactivatable, so it has no entry in the above table. The panning control and the wheel control are not visible on the map, but they cover the whole area of it.
The controls are by default "on" in 2D and 3D, so enabling them is unnecessary. Also, if you switch from 2D to 3D and back, you do not have to enable or disable the specific 2D/3D controls. The SDK will choose automatically the correct one.
An example for using the wheel control:
void MapWidget::wheelEvent( QWheelEvent *event )
{
    SDK_MapViewEventData eventData;
    SDK_InitMapViewEventData(&eventData);
    eventData.message = SDK_wmWHEEL;
    eventData.x = event->x();
    eventData.y = event->y();
    eventData.delta = event->delta();
    SDK_ERROR rc = SDK_SendMapViewEvent(mMapId, 0, &eventData, 0);
    update();
}
!!! note:
The SDK offers initialization functions to setup the SDK structs with the correct version and size informations and to set all other values to 0. It is mandatory to initialize a struct correctly when calling any SDK function, because every function checks for the version and size fields and returns an error if they are not set correctly. SDK_InitMapViewEventData() above is such a helper function. We have initialize functions for almost all structs used in the SDK. All of these functions can be found in the SDKDef.h header.
Enabling or disabling the standard controls
With a call to SDK_SetMapViewElements() you can enable or disable individual interactors. The second parameter of the function is a bit mask that describes which of the controls should be enabled. The third parameter is a bit mask for the controls that should not be enabled. Removing all interactors is done by:
    SDK_SetMapViewElements(mMapId, 0, (SDK_UINT4)(SDK_mapMEASURECTRL | SDK_mapPANNINGCTRL | SDK_mapROTATIONCTRL | SDK_mapSCALINGCTRL | SDK_mapROTATION3dCTRL |  SDK_mapHEIGHT3dCTRL));
    // shorter version with same result: SDK_SetMapViewElements(mMapId, 0, (SDK_UINT4)0xFFFF);
Handling map interaction manually
Deactivating the standard controls and manually controlling the interactions with the map is mostly useful when there is no mouse support or you want to have full control over the gestures. For instance, if you have a device that supports touch gestures, you will likely not use the standard interactors, because they didn't support all features that are needed for touch events.
Setting the scale and orientation values manually are straight forward with the above described SDK_SetMapViewParameter() function. Panning the map can also be done manually by calling SDK_TranslateMapByPixelPos().
An example for manually panning the map without the use of the panning interactor will be described in the next chapter.
Panning the map
Here we show how to pan the map either with the standard controls (mUseMapViewControls == SDK_TRUE) or manually:
void MapWidget::mousePressEvent(QMouseEvent *event)
{
    if(event->buttons() == Qt::LeftButton)
    {
        if (mUseMapViewControls)
        {
            SDK_MapViewEventData e;
            SDK_InitMapViewEventData(&e);
            e.message = SDK_wmLBUTTONDOWN;
            e.x = event->x();
            e.y = event->y();

            SDK_ERROR rc = SDK_SendMapViewEvent(mMapId, 0, &e, 0);
        }
        else
        {
            mMouseX = event->x();
            mMouseY = event->y();
            mDoDrag = true;
        }
    }
}

void MapWidget::mouseMoveEvent(QMouseEvent *event)
{
    if (event->buttons() == Qt::LeftButton)
    {
        if (mUseMapViewControls)
        {
            SDK_MapViewEventData e;
            SDK_InitMapViewEventData(&e);
            e.message = SDK_wmMOUSEMOVE;
            e.x = event->x();
            e.y = event->y();

            SDK_ERROR rc = SDK_SendMapViewEvent(mMapId, 0, &e, 0);
        }
        else
        {
            if (mDoDrag)
            {
                SDK_ERROR rc = SDK_TranslateMapByPixelPos(mMapId, mMouseX, mHeight - mMouseY, event->x(), mHeight - event->y());

                mMouseX = event->x();
                mMouseY = event->y();
            }
        }
        update();

    }
}

void MapWidget::mouseReleaseEvent(QMouseEvent *event)
{
    if (mUseMapViewControls)
    {
        SDK_MapViewEventData e;
        SDK_InitMapViewEventData(&e);
        e.message = SDK_wmLBUTTONUP;
        e.x = event->x();
        e.y = event->y();

        SDK_ERROR rc = SDK_SendMapViewEvent(mMapId, 0, &e, 0);
    }
    else
        mDoDrag = false;
}
In case that the standard map interactors are enabled, the only thing to do is to redirect the mouse press/move/release events to the map view via the function SDK_SendMapViewEvent().
If we are not using the standard pan interactor, we have to move the map manually with SDK_TranslateMapByPixelPos(). It needs as parameters the last coordinates and the current coordinates of the mouse (or touch) position. It will move the map relatively to the last position by the delta of the two values. In our example, the vertical values are reversed by substracting the y-coordinates of the mouse from the view height, because the coordinate system is upside down in relation to the internal coordinate system under Windows.
Freeing the map view
Freeing the map view has to be done when the map view should be destroyed. Call SDK_ReleaseMapView() to free all internal resources that has been created during the SDK_InitMapViewFB() call.
Resizing the map view
Resizing the map view means that we have to change the render buffer size. To do that, we have to destroy the buffer and the corresponding QImage we used for showing the buffer and recreate them in the new size. Then we call SDK_SendMapViewEvent() to inform the SDK that the size has changed:
void MapWidget::resizeEvent(QResizeEvent *ev)
{
    resizeBuffers();

    SDK_MapViewEventData data;
    SDK_InitMapViewEventData(&data);

    data.message = SDK_wmSIZE;
    data.width = mWidth;
    data.height = mHeight;

    SDK_SendMapViewEvent(mMapId, 0, &data, mBuffer);
}
When the MapWidget will be destroyed, we delete all allocated buffers and call SDK_ReleaseMapView() to free the map view in MapWidget::finalize():
void MapWidget::finalize()
{
    SDK_ERROR rc = SDK_ReleaseMapView(mMapId);
    if(mImage)
        delete mImage;
    if(mBuffer)
        delete[] mBuffer;
}
Customizing map colors
If you wan't to use your own map colors you can load your own color definition files with MapWidget::setMapDesign(). Our tutorial comes with some example color definitions for day and night mode.
void MapWidget::setMapDesign()
{
    QString fileNameDay = Constants::getDataPath();
    fileNameDay += "renderer/Roma_day.ini";
    SDK_ERROR rc = SDK_SetMapViewColorsFromFile(mMapId, fileNameDay.toStdWString().c_str(), SDK_TRUE);

    QString filenNameNight = Constants::getDataPath();
    filenNameNight += "renderer/Roma_night.ini";
    rc = SDK_SetMapViewColorsFromFile(mMapId, filenNameNight.toStdWString().c_str(), SDK_FALSE);
}
The color definitions are ini files with a [Colors] section and several color parameters. Colors are defined in RGB format, namely r,g,b, where r is red, g is green, and b is blue. r,g,b each take values in the range 0 to 255.
The [Colors] section can define the following parameters:
| Parameter | Description |
|---|---|
| COLMAPBACK | color for the map background |
| COLSTREET0 | color for the outside contour of a motorway |
| COLSTREET1 | color for the outside contour of a national road |
| COLSTREET2 | color for the outside contour of a motorway slip road |
| COLSTREET3 | color for the outside contour of a country road |
| COLSTREET4 | color for the outside contour for a fast urban road |
| COLSTREET5 | color for the outside contour for a normal urban road |
| COLSTREET6 | color for the outside contour of a ferry |
| COLPEDESTRIAN | color for the outside contour of a pedestrian zone/residential area |
| COLSTREET0_INNER | inside color for a motorway |
| COLSTREET1_INNER | inside color for a national road |
| COLSTREET2_INNER | inside color for a motorway slip road |
| COLSTREET3_INNER | inside color for a country road |
| COLSTREET4_INNER | inside color for a fast urban road |
| COLSTREET5_INNER | inside color for a normal urban road |
| COLSTREET6_INNER | inside color for a ferry |
| COLPEDESTRIAN_INNER | inside color for a pedestrian zone/residential area |
| COLROUTEINNER | inside color for a route trace |
| COLROUTEOUTER | outside color for a route trace |
| COLROUTEINNER_TARGETAREA | inside color for a route trace in a target area |
| COLROUTEOUTER_TARGETAREA | outside color for a route trace in a target area |
| COLROUTEINNER_ECOTAXE | inside colorfor a traffic truck toll on-route |
| COLROUTEOUTER_ECOTAXE | outside colorfor a traffic truck toll on-route |
| COLROUTEINNER_TOLL | inside colorfor a traffic toll on-route |
| COLROUTEOUTER_TOLL | outside colorfor a traffic toll on-route |
| COLTMCINNER | inside color for a traffic jam on-route |
| COLTMCOUTER | outside color for a traffic jam on-route |
| COLTMCINNEROFFROUTE | inside color for a traffic jam off-route |
| COLTMCOUTEROFFROUTE | outside color for a traffic jam off-route |
| COLTRUCKERSEGMENTS | color of segments that are restricted for trucks |
| COLMANOVERARROWBACK | shadow color for a maneuver arrow |
| COLMANOVERARROWFORE | color of a maneuver arrow |
| COLWATER | color for a lake, river, see |
| COLURBAN | color for the town area |
| COLINDUSTRY | color for an industrial zone |
| COLWOOD | color for a forrest |
| COLPARK | color for a park |
| COLSKY | color for the sky |
| COLHORIZON | color of the horizont |