06 Navigating a route
Overview
In this tutorial you will learn how to implement route navigation and how to interpret the maneuvers given by the NavigationSDK. We also show you an easy way to simulate a navigation along the current route for testing.
Base
Use Tutorial05 as a starting point for this project.
getGuidanceInformation
To get maneuvers for our current guidance, we have to call getGuidanceInformation() in our NavigationLoop. But we only have to call getGuidanceInformation() when we are navigating a route. So we add an isNavigation flag to our NavigationLoop to determine the status of our app. We use an AtomicBoolean to guarantee thread save access to it.
public class NavigationLoop extends Runnable {

    ...

    AtomicBoolean isNavigation = new AtomicBoolean(false);

    public void startNavigation() {
        isNavigation.set(true);
    }

    public void stopNavigation() {
        isNavigation.set(false);
    }

    public boolean isNavigation() {
        return isNavigation.get();
    }
}
Then we can call NavigationLoop.startNavigation() if calculateTour() returns no errors in the java.lang.Runnable in our MainActivy.
try {
    CalculateTourResult result =
            NavigationSDK.calculateTour(tour, calcRouteObserver);

    if (result.getError() != SDKErrorCode.Ok) {
        Toast.makeText(MainActivity.this, "route calculation failed", Toast.LENGTH_LONG).show();
    } else {
        navigationLoop.startNavigation();
    }
} catch (CalculateTourException | NavigationException e) {
    e.printStackTrace();
}
Now we can get the guidance information in the navigation loop. Because getGuidanceInformation() is a potentially long running operation, we would usually call it in a java.lang.Runnable and push it to our SDKJobQueue. But since we are already in a java.lang.Runnable - which is called in the SDKJobQueue - there is no need for this. If we have no route, it makes no sense to get guidance information. So we check and return early from the loop. In the end we check the getDestinationReached() flag of the returned NavigationInformation result to check if we have to stop the navigation.
public class NavigationLoop extends Runnable {
    ...

    @Override
    public void run() {
        try
        {
            ...
            if (isNavigation()) {
                final Result<NavigationInformation> result
                        = NavigationSDK.getGuidanceInformation(gps);

                if (result.getResult().getDestinationReached()) {
                    stopNavigation();
                }
            }
        }
        catch (NavigationException e)
        {
        }
    }

    ...
}
Rerouting
So whats happening if we deviate from the given route? Do we have to check and calculate a new route? No we don't have to, getGuidanceInformation() will take care of that. If we deviate only a little from our current route, the call to getGuidanceInformation() will pull us back to our current route. If we deviate a lot from our current route getGuidanceInformation() will do a complete new routing to our destination.
Maneuver Building
As an example we will implement a small control wich shows the distance, the street name and an icon representation of the next maneuver.
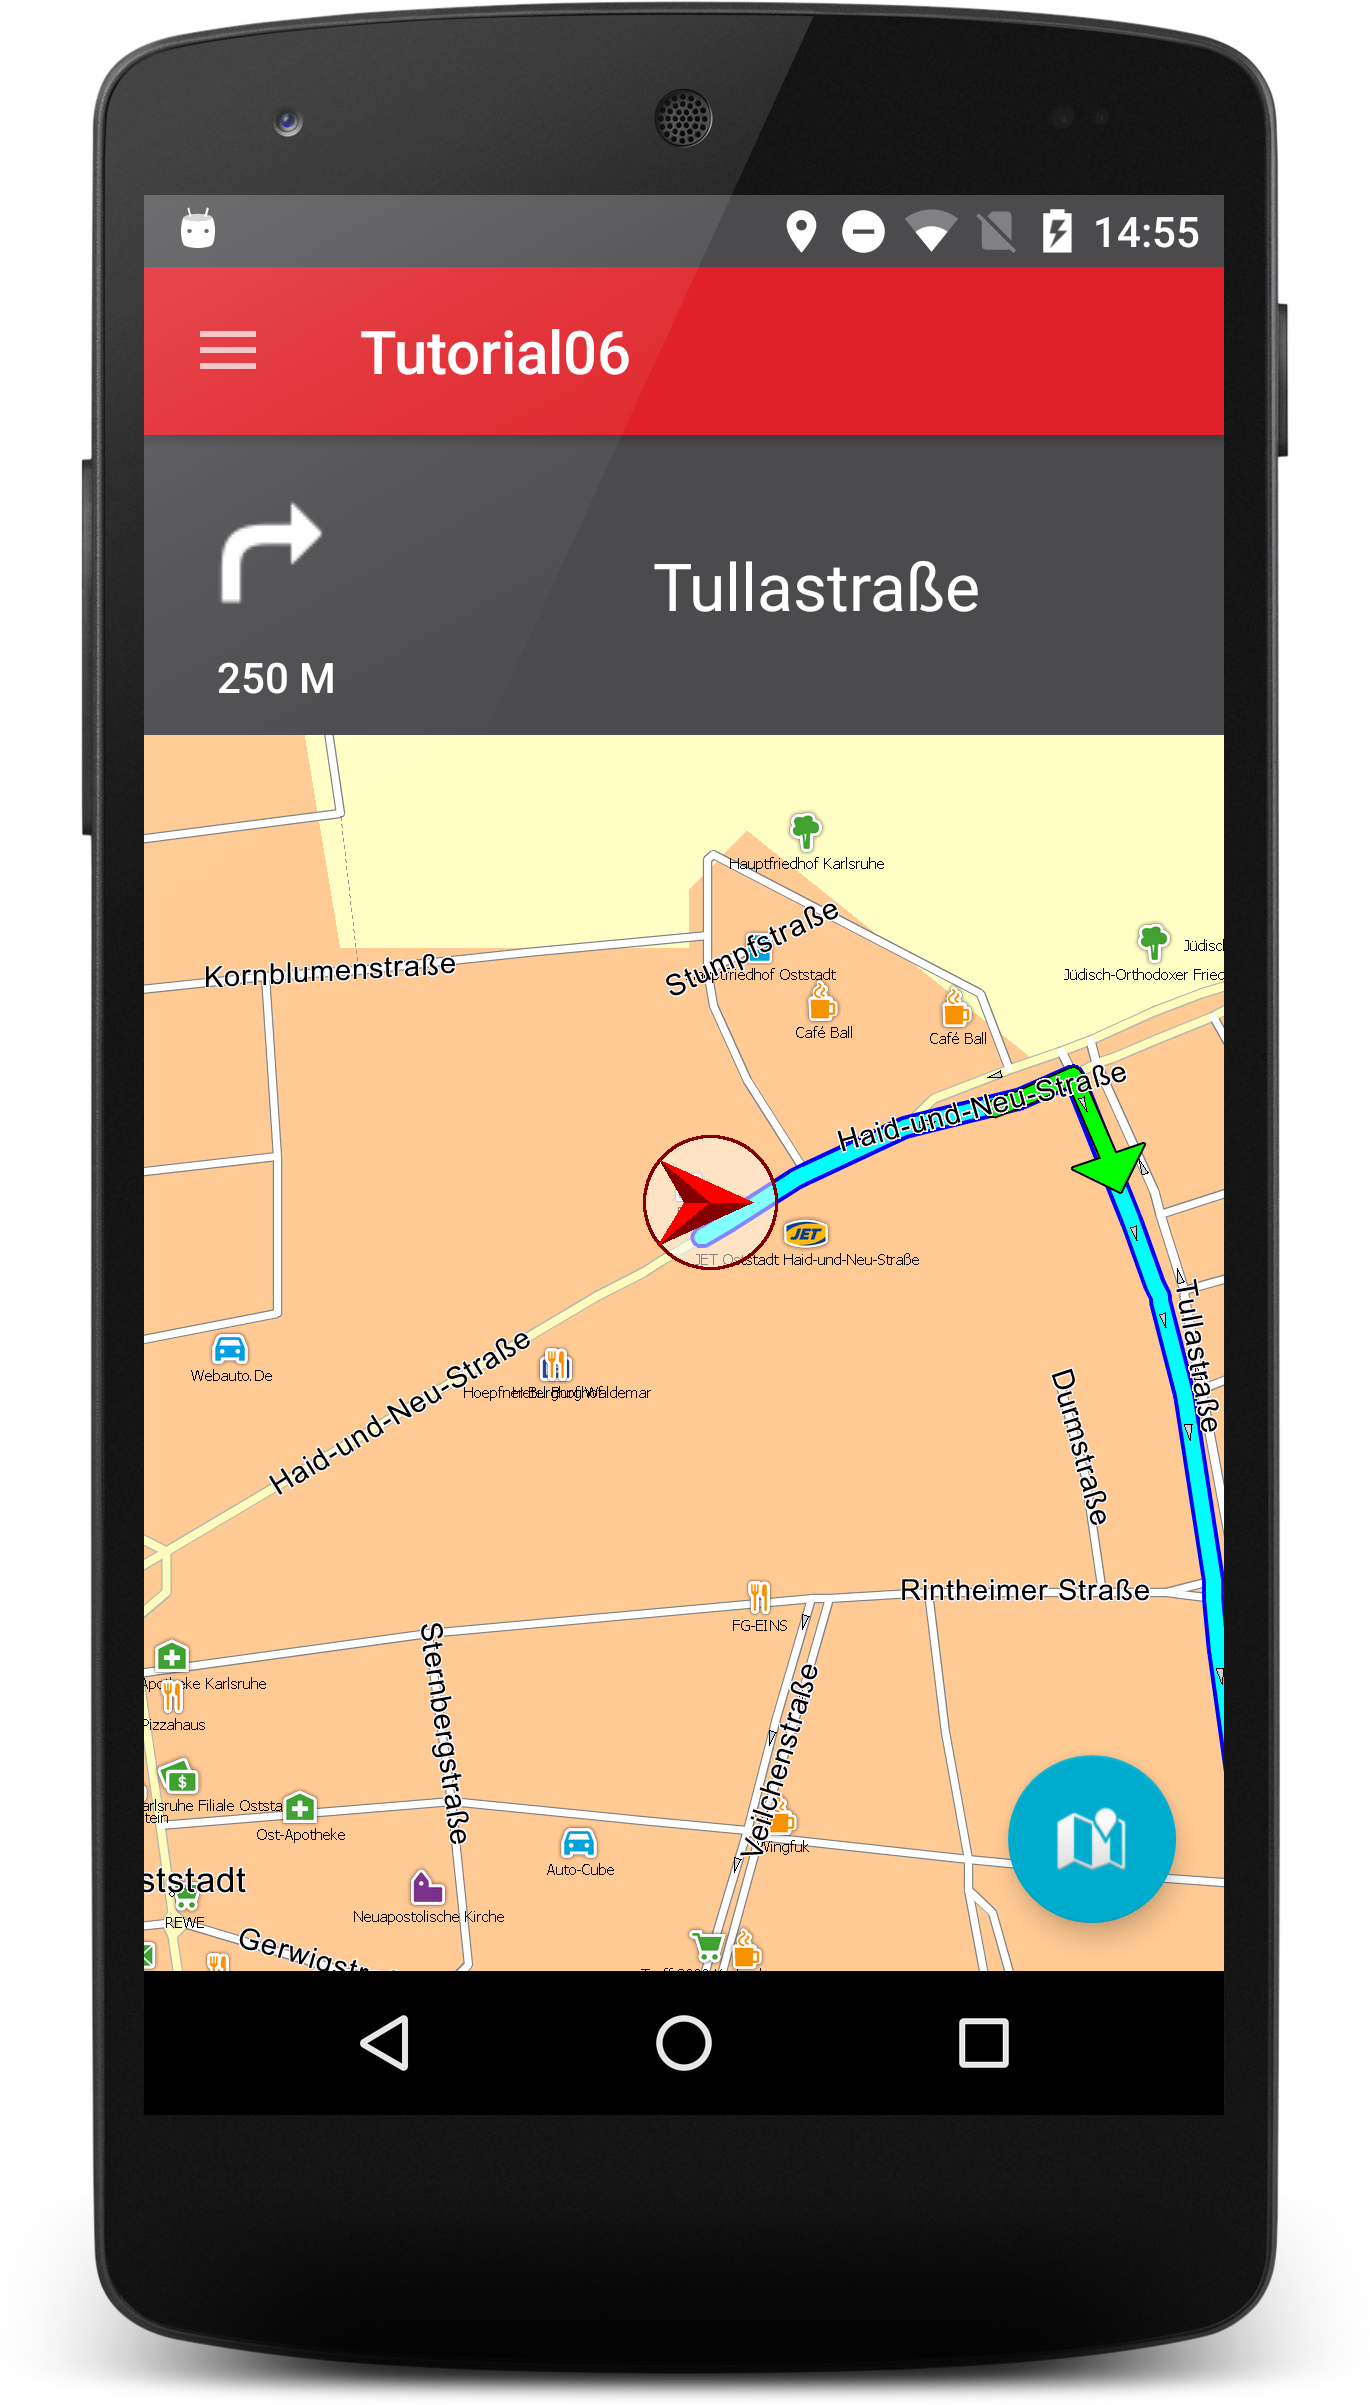
The control consists of a RelativeLayout with a Button and a TextView inside, which we include in our activity_main.xml. To avoid the normal Button border of the Material Design we set the style of the Button to Widget.AppCompat.Button.Borderless.
<?xml version="1.0" encoding="utf-8"?>
<android.support.design.widget.CoordinatorLayout xmlns:android="http://schemas.android.com/apk/res/android"
    xmlns:app="http://schemas.android.com/apk/res-auto"
    xmlns:tools="http://schemas.android.com/tools"
    android:id="@+id/activity_main"
    android:layout_width="match_parent"
    android:layout_height="match_parent"
    tools:context="com.ptvag.navigation.tutorial.MainActivity">

    <com.ptvag.navigation.tutorial.MapView
        android:id="@+id/map"
        android:layout_width="match_parent"
        android:layout_height="match_parent"
        app:layout_constraintBottom_toBottomOf="@+id/activity_main"
        app:layout_constraintLeft_toLeftOf="@+id/activity_main"
        app:layout_constraintRight_toRightOf="@+id/activity_main"
        app:layout_constraintTop_toTopOf="@+id/activity_main" />

    <RelativeLayout
        android:id="@+id/maneuverMain"
        android:layout_width="match_parent"
        android:layout_height="100dp"
        android:layout_alignParentTop="true"
        android:background="@color/colorPrimaryDark"
        android:gravity="top"
        android:visibility="visible">

        <Button
            android:id="@+id/maneuverBtn"
            style="@style/Widget.AppCompat.Button.Borderless"
            android:layout_width="wrap_content"
            android:layout_height="wrap_content"
            android:drawableTop="@drawable/arw_fwd_left"
            android:gravity="center_horizontal|bottom"
            android:text="500m" />

        <TextView
            android:id="@+id/maneuverText"
            android:layout_width="match_parent"
            android:layout_height="match_parent"
            android:layout_toRightOf="@id/maneuverBtn"
            android:gravity="center_vertical|center_horizontal"
            android:padding="10dp"
            android:text="Haid-und-Neu-Straße 15"
            android:textAppearance="@style/Base.TextAppearance.AppCompat.Large" />
    </RelativeLayout>

    <android.support.design.widget.FloatingActionButton
        android:layout_width="wrap_content"
        android:layout_height="wrap_content"
        android:layout_gravity="bottom|right"
        android:layout_margin="16dp"
        android:onClick="onFloatingButtonClicked"
        android:src="@android:drawable/ic_dialog_map"
        app:layout_anchor="@id/map"
        app:layout_anchorGravity="bottom|right|end" />

</android.support.design.widget.CoordinatorLayout>
To manage the content and visibility of this Control we implement a class called NextManeuverControl, based on a RelativeLayout, the Button and TextView as members. We give it a method bindView() to refresh these members from a given View. We also write a method update(NavigationInformation info) where we will show the control and update the TextView with the street name of the next maneuver. For not showing our control while not navigating, we hide it in the bindView() method.
public class NextManeuverControl {
    private ViewGroup main;
    private Button arrow;
    private TextView streetName;

    public NextManeuverControl() {
    }

    public void bindView(ViewGroup view) {
        main = view;
        arrow = (Button) main.findViewById(R.id.maneuverBtn);
        streetName = (TextView) main.findViewById(R.id.maneuverText);
        main.setVisibility(View.GONE);
    }

    public void update(NavigationInformation info) {
        if (!info.getDestinationReached()) {
            main.setVisibility(View.VISIBLE);
        }

        streetName.setText(info.getNextManeuver().getStreetName());
    }
}
To use the NextManeuverControl we create a member in the MainActivity and call bindView with the base RelativeLayout in onCreate of the MainActivity. Because we want to update the NextManeuverControl with our NavigationInformation in the NavigationLoop, we add it as a member and pass its constructor.
public class MainActivity extends AppCompatActivity  implements OnInitializeListener {
    NavigationLoop navigationLoop;
    NextManeuverControl nextManeuverControl = new NextManeuverControl();

    @Override
    protected void onCreate(Bundle savedInstanceState) {
        super.onCreate(savedInstanceState);
        setContentView(R.layout.activity_main);
        ...
        nextManeuverControl.bindView((ViewGroup)findViewById(R.id.maneuverMain));
        ...
        navigationLoop = new NavigationLoop(mapView, nextManeuverControl);

        ...
    }
}
public class NavigationLoop implements Runnable {
    private final MapView mapView;
    private final NextManeuverControl nextManeuverControl;

    public NavigationLoop(MapView mapView, NextManeuverControl nextManeuverControl) {
        this.mapView = mapView;
        this.nextManeuverControl = nextManeuverControl;
    }
}
To update it we just call nextManeuverControl.update() after getGuidanceInformation in the NavigationLoop.
if (isNavigation()) {
    final Result<NavigationInformation> result
            = NavigationSDK.getGuidanceInformation(gps);

    nextManeuverControl.update(result.getResult());

    if (result.getResult().getDestinationReached()) {
        stopNavigation();
    }
}
Attention
Don't update the GUI from the NavigationLoop. Only update the user interface from the GUI thread (aka main thread).
If we would run the application now, it would crash because we have to update our NextManeuverControl from the GUI thread, not from the SDKJobQueue thread. The easiest way to do this is to create a Handler in our MainActivity and pass it to our NavigationLoop and then call nextManeuverControl.update() in a Runnable which is posted to this Handler.
public class MainActivity extends AppCompatActivity  implements OnInitializeListener {
    Handler handler = new Handler();
    NavigationLoop navigationLoop;
    NextManeuverControl nextManeuverControl = new NextManeuverControl();

    @Override
    protected void onCreate(Bundle savedInstanceState) {
        super.onCreate(savedInstanceState);
        setContentView(R.layout.activity_main);
        ...
        nextManeuverControl.bindView((ViewGroup)findViewById(R.id.maneuverMain));
        ...
        navigationLoop = new NavigationLoop(handler, mapView, nextManeuverControl);

        ...
    }
}
public class NavigationLoop implements Runnable {
    private final Handler handler;
    private final MapView mapView;
    private final NextManeuverControl nextManeuverControl;

    public NavigationLoop(Handler handler, MapView mapView,
                            NextManeuverControl nextManeuverControl) {
        this.handler = handler;
        this.mapView = mapView;
        this.nextManeuverControl = nextManeuverControl;
    }
}
if (isNavigation()) {
    final Result<NavigationInformation> result
            = NavigationSDK.getGuidanceInformation(gps);

    handler.post(new Runnable() {
        @Override
        public void run() {
            nextManeuverControl.update(result.getResult());
        }
    });

    if (result.getResult().getDestinationReached()) {
        stopNavigation();
    }
}
To update the button of the control with a maneuver arrow, we have to interpret the ManeuverDescription given by getNextManeuver() and the CrossingView given by getNextManeuverCrossingView().
We implement an example how to map these informations into a maneuver arrow in a new method getDrawable in the NextManeuverControl using NavigationSDK.getManeuverArrow. The returned Drawable is set to the button with setCompoundDrawablesWithIntrinsicBounds. You will find all example arrows in the res folder of Tutorial06. In addition we set the distance to the maneuver as the text of the Button. To get a human readable string of NavigationInformation.getDistToNextManeuver() we pass it to NavigationSDK.getLocalizedDistanceString().
@Override
   public void update(NavigationInformation info) {
       if (!info.getDestinationReached()) {
           main.setVisibility(View.VISIBLE);
       }

       arrow.setCompoundDrawablesWithIntrinsicBounds(0, getDrawable(info.getNextManeuver(), info.getNextManeuverCrossingView()), 0, 0);

       arrow.setText(NavigationSDK.getLocalizedDistanceString(info.getDistToNextManeuver(), true, true, "now"));
       streetName.setText(info.getNextManeuver().getStreetName());
   }

   private int getDrawable(ManeuverDescription description, CrossingView crossingView) {
       ManeuverArrow arrow = NavigationSDK.getManeuverArrow(description, crossingView);

       switch (arrow) {
           case None:
               return R.drawable.arw_fwd;
           case Left:
               return R.drawable.arw_left;
           case Right:
               return R.drawable.arw_right;
           case FowardLeft:
               return R.drawable.arw_fwd_left;
           case FowardRight:
               return R.drawable.arw_fwd_right;
           case UTurnLeft:
               return R.drawable.arw_uturn_left;
           case UTurnRight:
               return R.drawable.arw_uturn_right;
           case WeakLeft:
               return R.drawable.arw_fwd_left_weak;
           case WeakRight:
               return R.drawable.arw_fwd_right_weak;
           case RoundaboutRight045:
               return R.drawable.arw_rb_right1;
           case RoundaboutRight090:
               return R.drawable.arw_rb_right2;
           case RoundaboutRight135:
               return R.drawable.arw_rb_right3;
           case RoundaboutRight180:
               return R.drawable.arw_rb_right4;
           case RoundaboutRight225:
               return R.drawable.arw_rb_right5;
           case RoundaboutRight270:
               return R.drawable.arw_rb_right6;
           case RoundaboutRight315:
               return R.drawable.arw_rb_right7;
           case RoundaboutLeft045:
               return R.drawable.arw_rb_left7;
           case RoundaboutLeft090:
               return R.drawable.arw_rb_left6;
           case RoundaboutLeft135:
               return R.drawable.arw_rb_left5;
           case RoundaboutLeft180:
               return R.drawable.arw_rb_left4;
           case RoundaboutLeft225:
               return R.drawable.arw_rb_left3;
           case RoundaboutLeft270:
               return R.drawable.arw_rb_left2;
           case RoundaboutLeft315:
               return R.drawable.arw_rb_left1;
           case Foward:
               return R.drawable.arw_fwd;
           case LeaveMotorWayLeft:
               return R.drawable.arw_mw_left;
           case LeaveMotorWayRight:
               return R.drawable.arw_mw_right;
           case Destination:
               return R.drawable.arw_destination;
           default:
               return R.drawable.arw_fwd;
       }
   }
Simulate driving
For easy testing, the NavigationSDK brings its own simulation mechanism. To use it we simply generate a simulation file by calling NavigationSDK.createGPSSimulation() after a route calculation. We then close our current GPSDevice by calling GPSManager.getInstance().closeGPSDevice() and reopen a simulated GPSDevice with GPSManager.getInstance().openSimulatedGPSDevice().
Attention
Don't push locations to the SDK by calling GPSManager.getInstance().pushLocation() while simulating! Only get the current position with GPSManager.getInstance().getCurrentPosition(). The simulation will step to the next position with every call to getCurrentPosition().
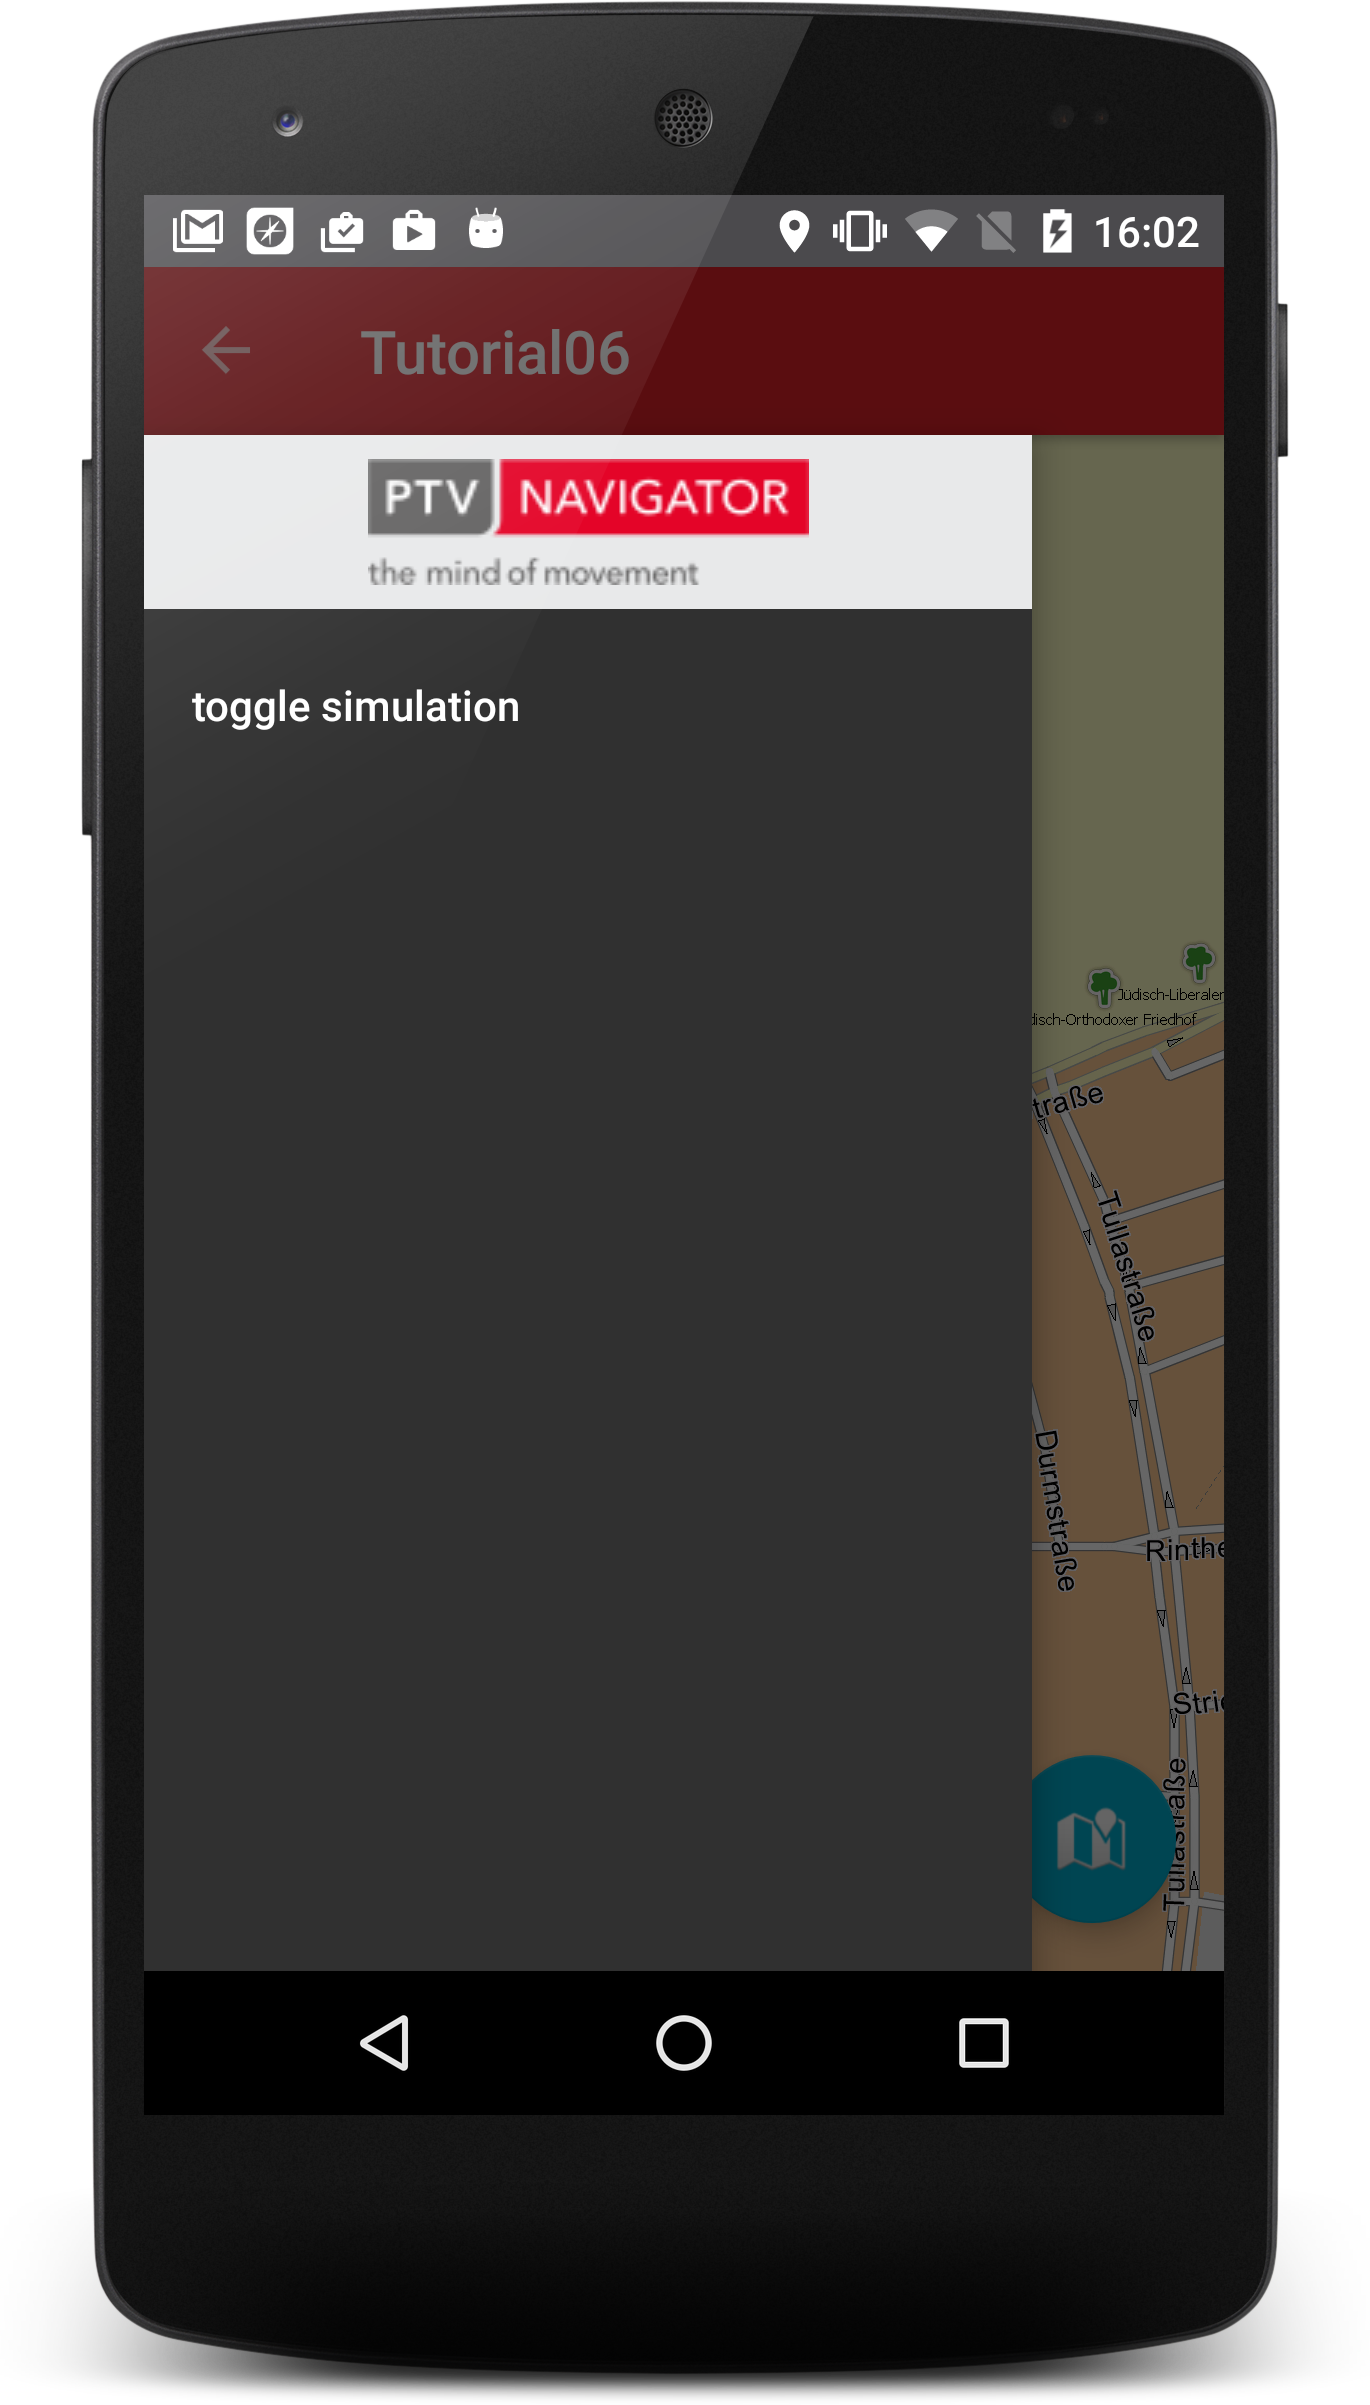
To start a simulation, we will introduce a drawer menu to our tutorial where one of its entries will start the simulation.
Because the implementation of an android drawer is out of the scope of this tutorial we deliver a helper module for this. For integration, simply copy the helper folder from our tutorial sources to your base project and add the helper module to the settings.gradle and as a dependency to your tutorial module gradle.build file.
settings.gradle
include ':helper'
...
dependencies {
    ...
    compile project(path: ':helper')
}
    For the helper module we need a base style without an ActionBar. For example set the parent of your main style in the styles.xml to `Theme.AppCompat.NoActionBar`.

With our helper module we just have to change the base class of the MainActivity to `DrawerActivity`. And because the helper now declares the Actionbar we need to change the base theme to `Theme.AppCompat.NoActionBar`. Also we need a `drawer_menu.xml` in `res/menu` with the simulation entry which we inflate by calling `inflateNavigationMenu(R.menu.drawer_menu)` in the MainActivities onCreate method. By overriding `onNavigationItemSelected` we can respond to a click in the drawer menu. To avoid calling `pushLocation` we also introduce an [AtomicBoolean](https://developer.android.com/reference/java/util/concurrent/atomic/AtomicBoolean.html) called `simulation`
 which is toggled by clicking on simulation.

```xml
<?xml version="1.0" encoding="utf-8"?>
<menu xmlns:android="http://schemas.android.com/apk/res/android" >
    <item android:id="@+id/menu_simulation" android:title="toggle simulation"></item>
</menu>
public class MainActivity extends DrawerActivity implements OnInitializeListener {
    ...
    private AtomicBoolean simulation = new AtomicBoolean(false);

    private LocationListener locationListener = new LocationListener() {
        @Override
        public void onLocationChanged(final Location location) {
            SDKJobQueue.getInstance().push(new Runnable() {
                @Override
                public void run() {
                    if (!simulation.get()) {
                        GPSManager.getInstance().pushLocation(location);
                    }
                }
            });
        }
        ...
    };

    @Override
    protected void onCreate(Bundle savedInstanceState) {
        super.onCreate(savedInstanceState);
        setContentView(R.layout.activity_main);
        inflateNavigationMenu(R.menu.drawer_menu);
        ...
    }

    @Override
    public boolean onNavigationItemSelected(@NonNull MenuItem item) {

        switch (item.getItemId()){
            case R.id.menu_simulation:
                if (navigationLoop.isNavigation()) {
                    try {
                        if (simulation.get()) {
                            simulation.set(false);
                            GPSManager.getInstance().closeGPSDevice();
                            GPSManager.getInstance().openGPSDevice(true);
                        } else {
                            File simFilePath = new File(Application.getDataPath(), "simulation.dat");
                            NavigationSDK.createGPSSimulation(simFilePath);
                            GPSManager.getInstance().closeGPSDevice();
                            GPSManager.getInstance().openSimulatedGPSDevice(true, simFilePath);
                            simulation.set(true);
                        }
                    } catch (NavigationException e) {
                        e.printStackTrace();
                    }
                }
                break;
        }

        return super.onNavigationItemSelected(item);
    }

    ...
}
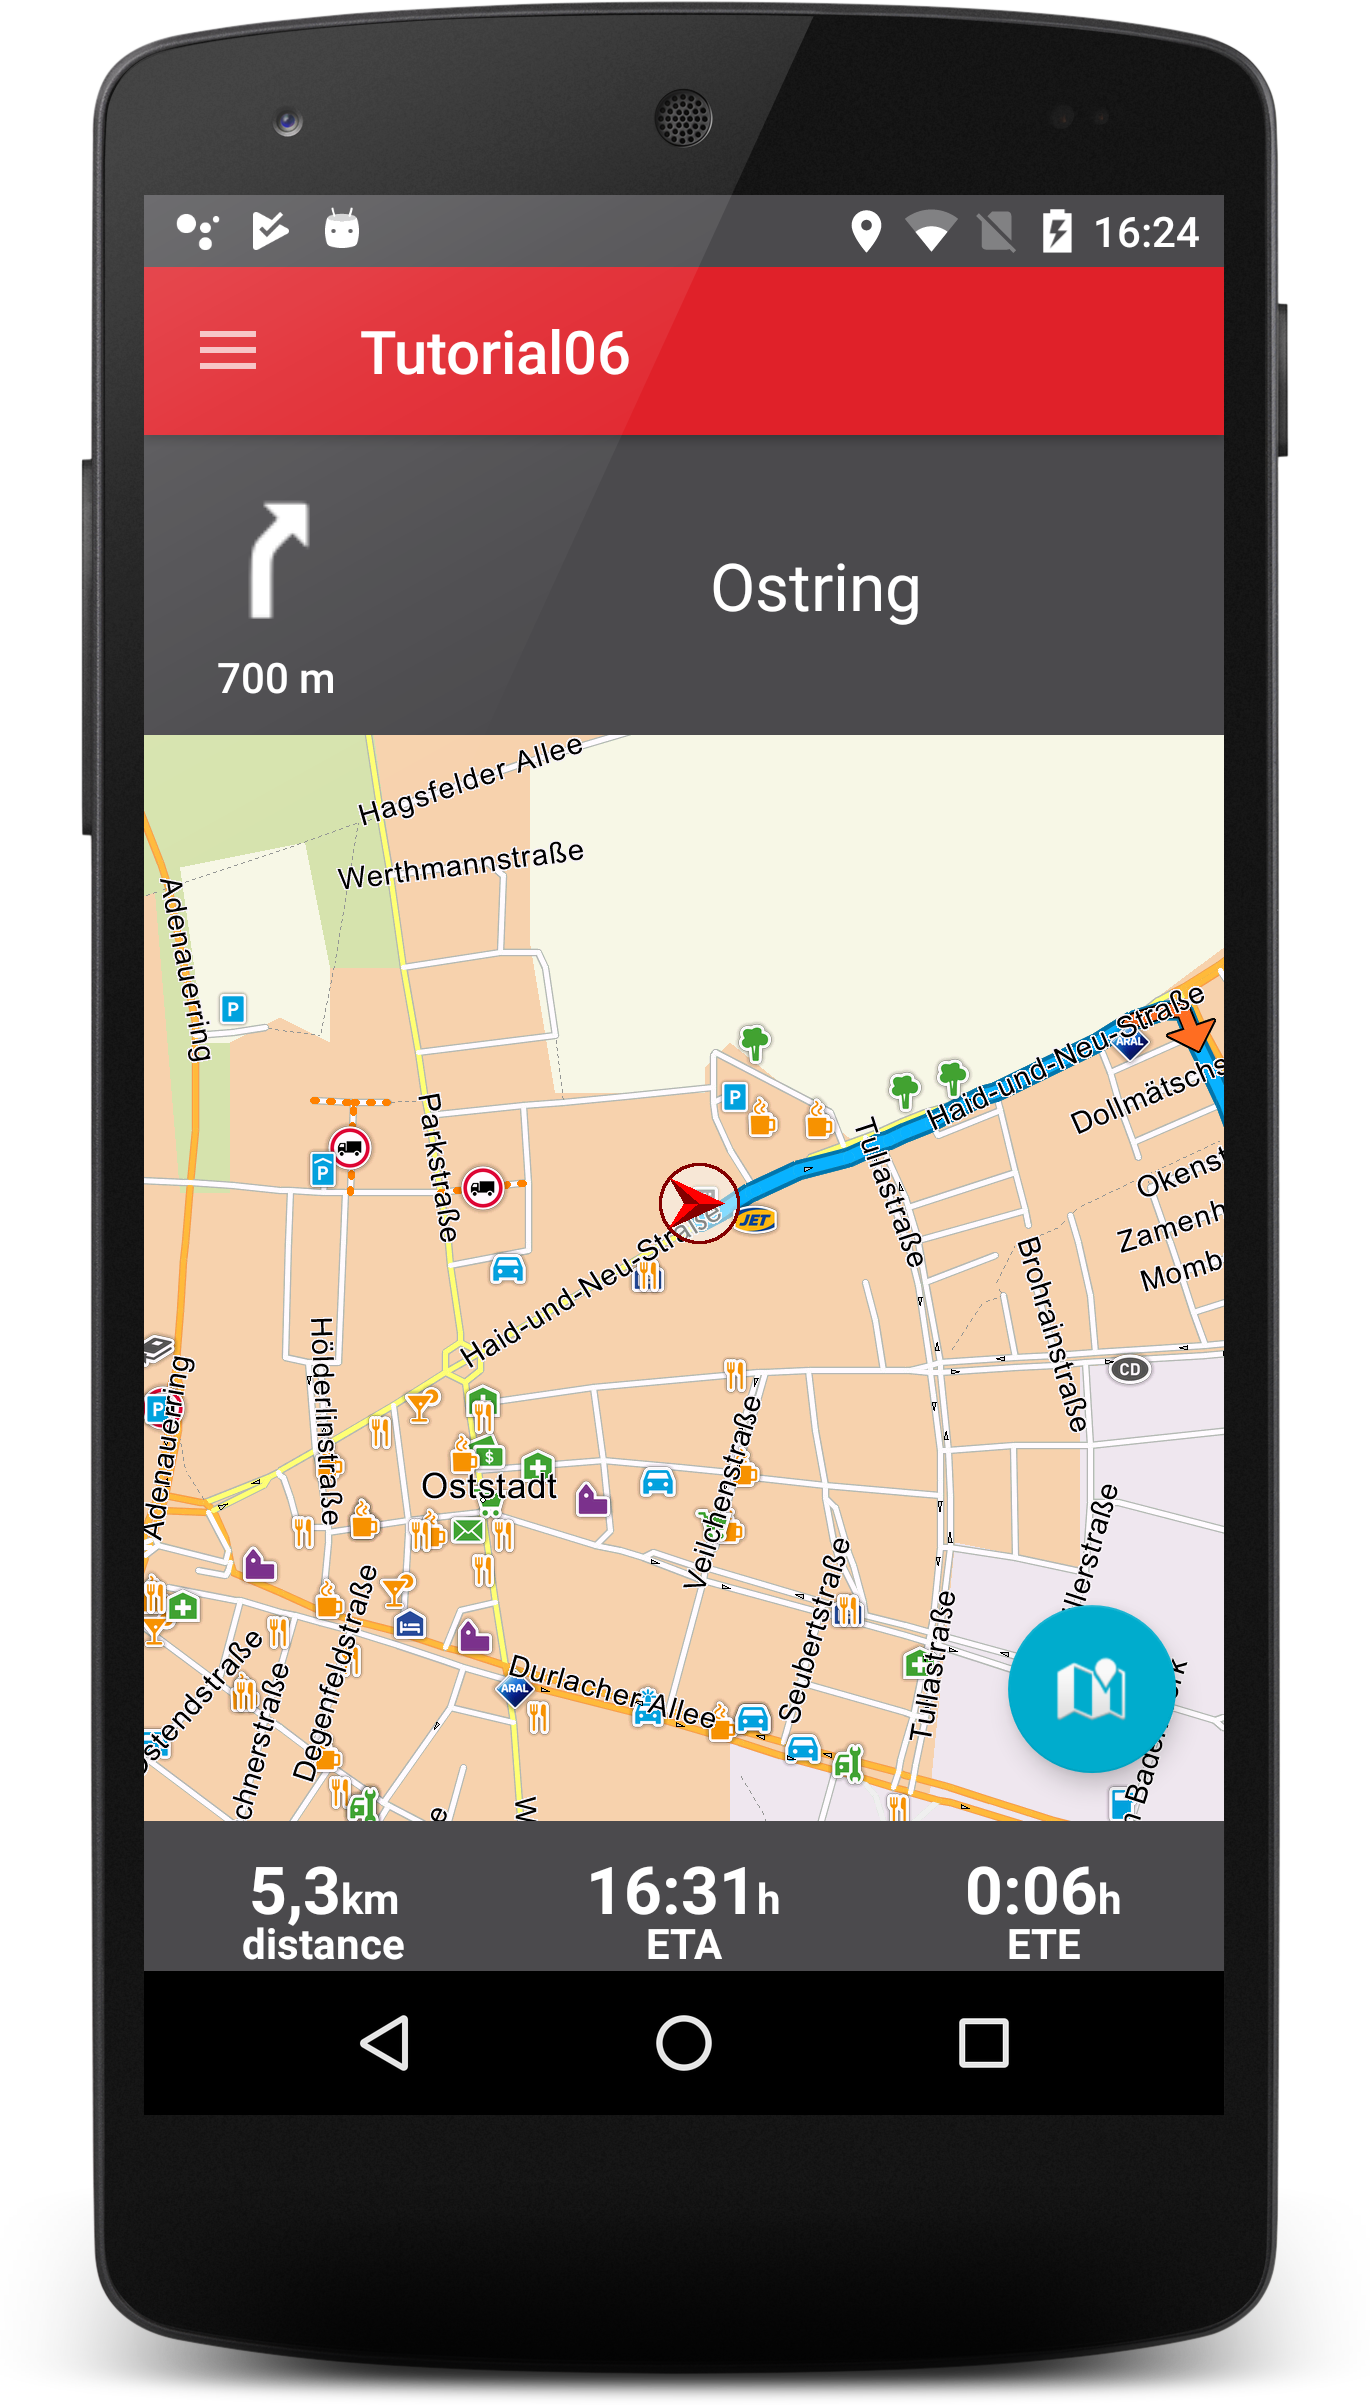
Adding Information Controls
What about adding some more information about our current Navigation? Lets add a View showing the current ETA (estimated time of arrival), the current ETE (estimated time enroute) or the current distanve to the current target.
To achieve this we first will first extract a NavigationControl class from the NextManeuverControl to allow updating of several controls from the NavigationLoop.
package com.ptvag.navigation.tutorial;

import com.ptvag.navigation.sdk.NavigationInformation;

interface NavigationControl {
    void update(NavigationInformation info);
}
public class NextManeuverControl implements NavigationControl {
    ...
    @Override
    public void update(NavigationInformation info) {
        ...
    }
...
}
Then we add a List of NavigationControls to the NavigationLoop instead of the single NextManeuverControl.
...
class NavigationLoop implements Runnable {
    ...
    private final List<NavigationControl> controls = new ArrayList<>();

    public NavigationLoop(Handler handler, MapView mapView) {
        this.handler = handler;
        this.mapView = mapView;
    }

    public void addControl(NavigationControl control) {
        controls.add(control);
    }

    @Override
    public void run() {
        try
        {
            ...
            if (isNavigation()) {
                final Result<NavigationInformation> result = NavigationSDK.getGuidanceInformation(gps);

                handler.post(new Runnable() {
                    @Override
                    public void run() {
                        for (NavigationControl control : controls) {
                            control.update(result.getResult());
                        }
                    }
                });
                ...
            }
        }
        ...
    }
...
}
We also change the initialization of the NavigationLoop according to our new structure.
...
public class MainActivity extends DrawerActivity implements OnInitializeListener {
    private MapView mapView;
    private NavigationLoop navigationLoop;
    private final NextManeuverControl nextManeuverControl = new NextManeuverControl();
    ...
    @Override
    protected void onCreate(Bundle savedInstanceState) {
        ...
        navigationLoop = new NavigationLoop(handler, mapView);
        navigationLoop.addControl(nextManeuverControl);
        ...
    }
}
To show ETA, ETE and distance we now design a Layout control_info.xml which holds a value, the unit and the description of the control.
<?xml version="1.0" encoding="utf-8"?>
<RelativeLayout xmlns:android="http://schemas.android.com/apk/res/android"
    xmlns:tools="http://schemas.android.com/tools"
    android:id="@+id/navigationInfo1"
    android:layout_width="0pt"
    android:layout_height="50dp"
    android:layout_weight="1"
    tools:showIn="@layout/activity_main">

    <LinearLayout
        android:layout_width="wrap_content"
        android:layout_height="wrap_content"
        android:layout_centerHorizontal="true"
        android:layout_centerVertical="true">

        <TextView
            android:id="@+id/value"
            android:layout_width="wrap_content"
            android:layout_height="wrap_content"
            android:gravity="center"
            android:paddingBottom="5dp"
            android:textAppearance="@style/Base.TextAppearance.AppCompat.Large"
            android:textColor="#ffffffff"
            android:textStyle="bold" />

        <TextView
            android:id="@+id/unit"
            android:layout_width="wrap_content"
            android:layout_height="wrap_content"
            android:gravity="center"
            android:paddingBottom="5dp"
            android:textAppearance="@style/Base.TextAppearance.AppCompat.Small"
            android:textColor="#ffffffff"
            android:textStyle="bold" />
    </LinearLayout>

    <TextView
        android:id="@+id/description"
        android:layout_width="wrap_content"
        android:layout_height="wrap_content"
        android:layout_alignParentBottom="true"
        android:layout_centerHorizontal="true"
        android:gravity="center"
        android:textAppearance="@style/Base.TextAppearance.AppCompat.Small"
        android:textColor="#ffffffff"
        android:textStyle="bold" />
</RelativeLayout>
Afterwards we include the layout in our MainActivity 3 times right before our FloatingActionButton.
<?xml version="1.0" encoding="utf-8"?>
<RelativeLayout
    xmlns:android="http://schemas.android.com/apk/res/android"
    xmlns:tools="http://schemas.android.com/tools"
    android:id="@+id/activity_main"
    android:layout_width="match_parent"
    android:layout_height="match_parent"
    tools:context="com.ptvag.navigation.tutorial.MainActivity">
    ...
    <LinearLayout
        android:id="@+id/infoMain"
        android:layout_width="match_parent"
        android:layout_height="wrap_content"
        android:layout_alignParentBottom="true"
        android:background="@color/colorPrimaryDark"
        android:visibility="visible" >

        <include layout="@layout/control_info" android:id="@+id/info1"/>
        <include layout="@layout/control_info" android:id="@+id/info2"/>
        <include layout="@layout/control_info" android:id="@+id/info3" />
    </LinearLayout>

    <android.support.design.widget.FloatingActionButton
        android:layout_width="wrap_content"
        android:layout_height="wrap_content"
        android:layout_above="@id/infoMain"
        android:layout_alignParentRight="true"
        android:layout_alignParentEnd="true"
        android:layout_margin="16dp"
        android:src="@android:drawable/ic_dialog_map"
        android:onClick="onFloatingButtonClicked"/>
</RelativeLayout>
The Implemention of the 3 NavigationControls looks similar to the NextManeuverControl. We save our value, unit and description views in the bindView method an update its text in onUpdate. We subclassed our control to show different information for ETA, ETE and distance.
package com.ptvag.navigation.tutorial;

import android.view.View;
import android.view.ViewGroup;
import android.widget.TextView;

import com.ptvag.navigation.sdk.NavigationInformation;
import com.ptvag.navigation.sdk.NavigationSDK;

import java.text.SimpleDateFormat;
import java.util.concurrent.TimeUnit;

public class NavigationInformationControl implements NavigationControl {
    private ViewGroup main;
    TextView value;
    TextView unit;
    TextView description;

    public static class Distance extends NavigationInformationControl {
        @Override
        public void update(NavigationInformation info){
            super.update(info);

            String[] tmp = NavigationSDK.getLocalizedDistanceString(info.getDistToDestination(), true, false, "").split(" ");
            value.setText(tmp[0]);
            unit.setText(tmp[1]);
            description.setText("distance");
        }
    }

    public static class ETA extends NavigationInformationControl {
        @Override
        public void update(NavigationInformation info){
            super.update(info);
            SimpleDateFormat format = new SimpleDateFormat("HH:mm");

            value.setText(format.format(info.getEstimatedTimeOfArrival()));
            unit.setText("h");
            description.setText("ETA");
        }
    }

    public static class ETE extends NavigationInformationControl {
        @Override
        public void update(NavigationInformation info){
            super.update(info);

            value.setText(formatTimeSpan(info.getTimeToDestination()));
            unit.setText(formatTimeSpanWithoutValue(info.getTimeToDestination()));
            description.setText("ETE");
        }
    }

    public void bindView(ViewGroup view) {
        main = view;
        value = (TextView) main.findViewById(R.id.value);
        unit = (TextView) main.findViewById(R.id.unit);
        description = (TextView) main.findViewById(R.id.description);

        main.setVisibility(View.GONE);
    }

    @Override
    public void update(NavigationInformation info) {
        if (!info.getDestinationReached()) {
            main.setVisibility(View.VISIBLE);
        }
    }

    String formatTimeSpan(long totalSeconds) {
        double doubleDays = (double) totalSeconds / (double) (3600 * 24);
        long days = TimeUnit.SECONDS.toDays(totalSeconds);
        long hours = TimeUnit.SECONDS.toHours(totalSeconds) - (days *24);
        long minutes = TimeUnit.SECONDS.toMinutes(totalSeconds) - (TimeUnit.SECONDS.toHours(totalSeconds)* 60);

        if (days >= 1) {
            return String.format("%.1f", doubleDays);
        } else {
            return String.format("%d:%02d", hours, minutes);
        }
    }

    String formatTimeSpanWithoutValue(long totalSeconds) {
        double days = (double) totalSeconds / (double) (3600 * 24);
        if (days > 1d) {
            return "d";
        } else {
            return "h";
        }
    }
}
So we only need to add this controls in the MainActivity and we are good to go.
...
public class MainActivity extends DrawerActivity implements OnInitializeListener {
    private MapView mapView;
    private NavigationLoop navigationLoop;
    private final NextManeuverControl nextManeuverControl = new NextManeuverControl();
    private final NavigationInformationControl distanceControl = new NavigationInformationControl.Distance();
    private final NavigationInformationControl etaControl = new NavigationInformationControl.ETA();
    private final NavigationInformationControl eteControl = new NavigationInformationControl.ETE();

    ...

    @Override
    protected void onCreate(Bundle savedInstanceState) {
        super.onCreate(savedInstanceState);
        setContentView(R.layout.activity_main);
        inflateNavigationMenu(R.menu.drawer_menu);

        nextManeuverControl.bindView((ViewGroup)findViewById(R.id.stationInfoMain));
        distanceControl.bindView((ViewGroup)findViewById(R.id.info1));
        etaControl.bindView((ViewGroup)findViewById(R.id.info2));
        eteControl.bindView((ViewGroup)findViewById(R.id.info3));

        ...

        navigationLoop = new NavigationLoop(handler, mapView);
        navigationLoop.addControl(nextManeuverControl);
        navigationLoop.addControl(distanceControl);
        navigationLoop.addControl(etaControl);
        navigationLoop.addControl(eteControl);
        ...
    }
}
Autozoom
Manual zoom levels hide many informations while driving. We need good zoom levels according to our current speed and navigation situation. We provide you with good default zoom levels while driving if you add a doAutoZoom call to your NavigationLoop.
...

class NavigationLoop implements Runnable {
    private final MapView mapView;
    ...

    @Override
    public void run() {
        try
        {
            ...

            if (isNavigation()) {
                final Result<NavigationInformation> result = NavigationSDK.getGuidanceInformation(gps);

                handler.post(new Runnable() {
                    @Override
                    public void run() {
                        for (NavigationControl control : controls) {
                            control.update(result.getResult());
                        }

                        // add autozoom for current NavigationInformation and current gps
                        // use smooth steps for zooming
                        mapView.doAutoZoom(result.getResult(), gps, true);
                    }
                });

                ...
            }
        }
        catch (NavigationException ignored)
        {
        }
    }
    ...
}
To configure the Autozoom you can have a look at the following NavigationSDK methods.
| Config method | Description |
|---|---|
| setAutoZoomSpeedScales() | Set the auto zoom scales for the given speeds for tracking and navigation mode |
| setAutoZoomScaleMargins() | Set the auto zoom scale margins in 2d and 3d |
| setAutoZoomSteppingValues() | Set the auto zoom linear approximation stepping values |
Navigation in driving direction
While navigation we a map oriented in driving direction is prevered to we add automatic map rotation to our NavigationLoop and move the FixPoint of our MapView down so we can see more of the road ahead.
class NavigationLoop implements Runnable {
    ...

    @Override
    public void run() {
        try
        {
            ...

            if (isNavigation()) {
                ...

                handler.post(new Runnable() {
                    @Override
                    public void run() {
                        ...

                        mapView.doAutoZoom(result.getResult(), gps, true);
                        mapView.setOrientation(270 + gps.getCourse());
                        mapView.setFixPoint(new Position(0,-39));
                    }
                });

                ...
            }
        }
        catch (NavigationException ignored)
        {
        }
    }
    ...
}